


Quaking Punch to the Top! My Regionals Recap: A Look at Toad Post Fates Collide
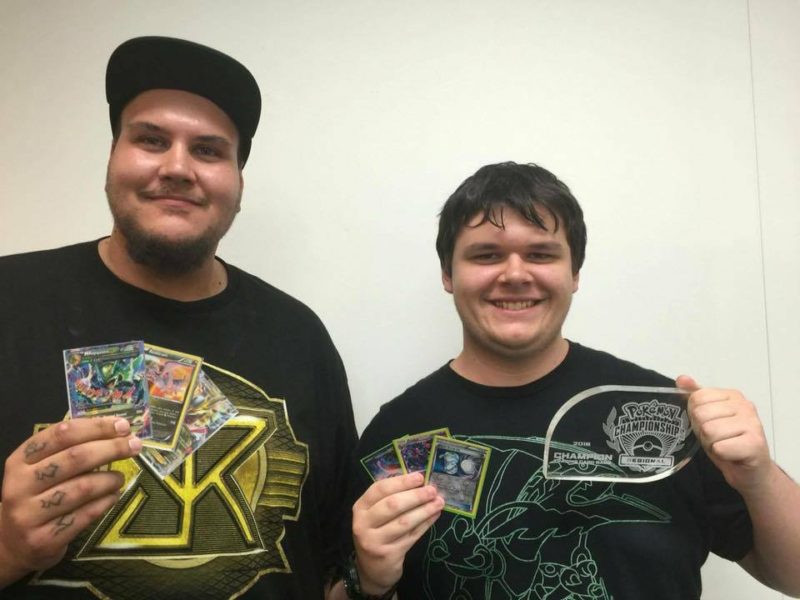
Hello Everyone! My name is Jordan Palmer and for those of you who don’t know me I am a Pokémon player from South Australia as well as an admin of Ace Trainer Australia. I have achieved many accomplishments over the past few years since I have been playing but in this article I will be focusing only on my results from the last three weeks at Regional Championships. I was fortunate enough to make the finals of these three events all using a Seismitoad/Crobat deck (more commonly known as Toad Bats). Toad Bats isn’t a very popular deck in standard format due to the lack of Hypnotoxic Laser. However I always believed Toad Bats had the potential to be a top contender in Standard and because Australia doesn’t get the expanded format, that’s exactly what I did.
In this article I will be discussing my Toad Bats list in detail as well as my regionals run at the Queensland, South Australia and Victoria Regional Championships. I will also be giving a brief analysis on how Fates Collide changes the metagame for the Australian National Championships and World Championships later this year. Does Toad have what it takes to stay competitive in the XY-Fates Collide format? Read on to find out!
Preparation:
Leading up to the Queensland Regional Championships I was intending to play Night March with a 1-1 Milotic line as I thought it was a safe play going into a fairly unknown field as the Milotic helps against some item lock decks. However the more I tested with the deck the less confident I felt, about a week before the event I decided to bring out the secret Toad Bats list I’d been working on for the week after. I had some success with Toad Bats earlier in the season during Cities, so I felt confident playing it, with some updates to the deck I settled on this list.
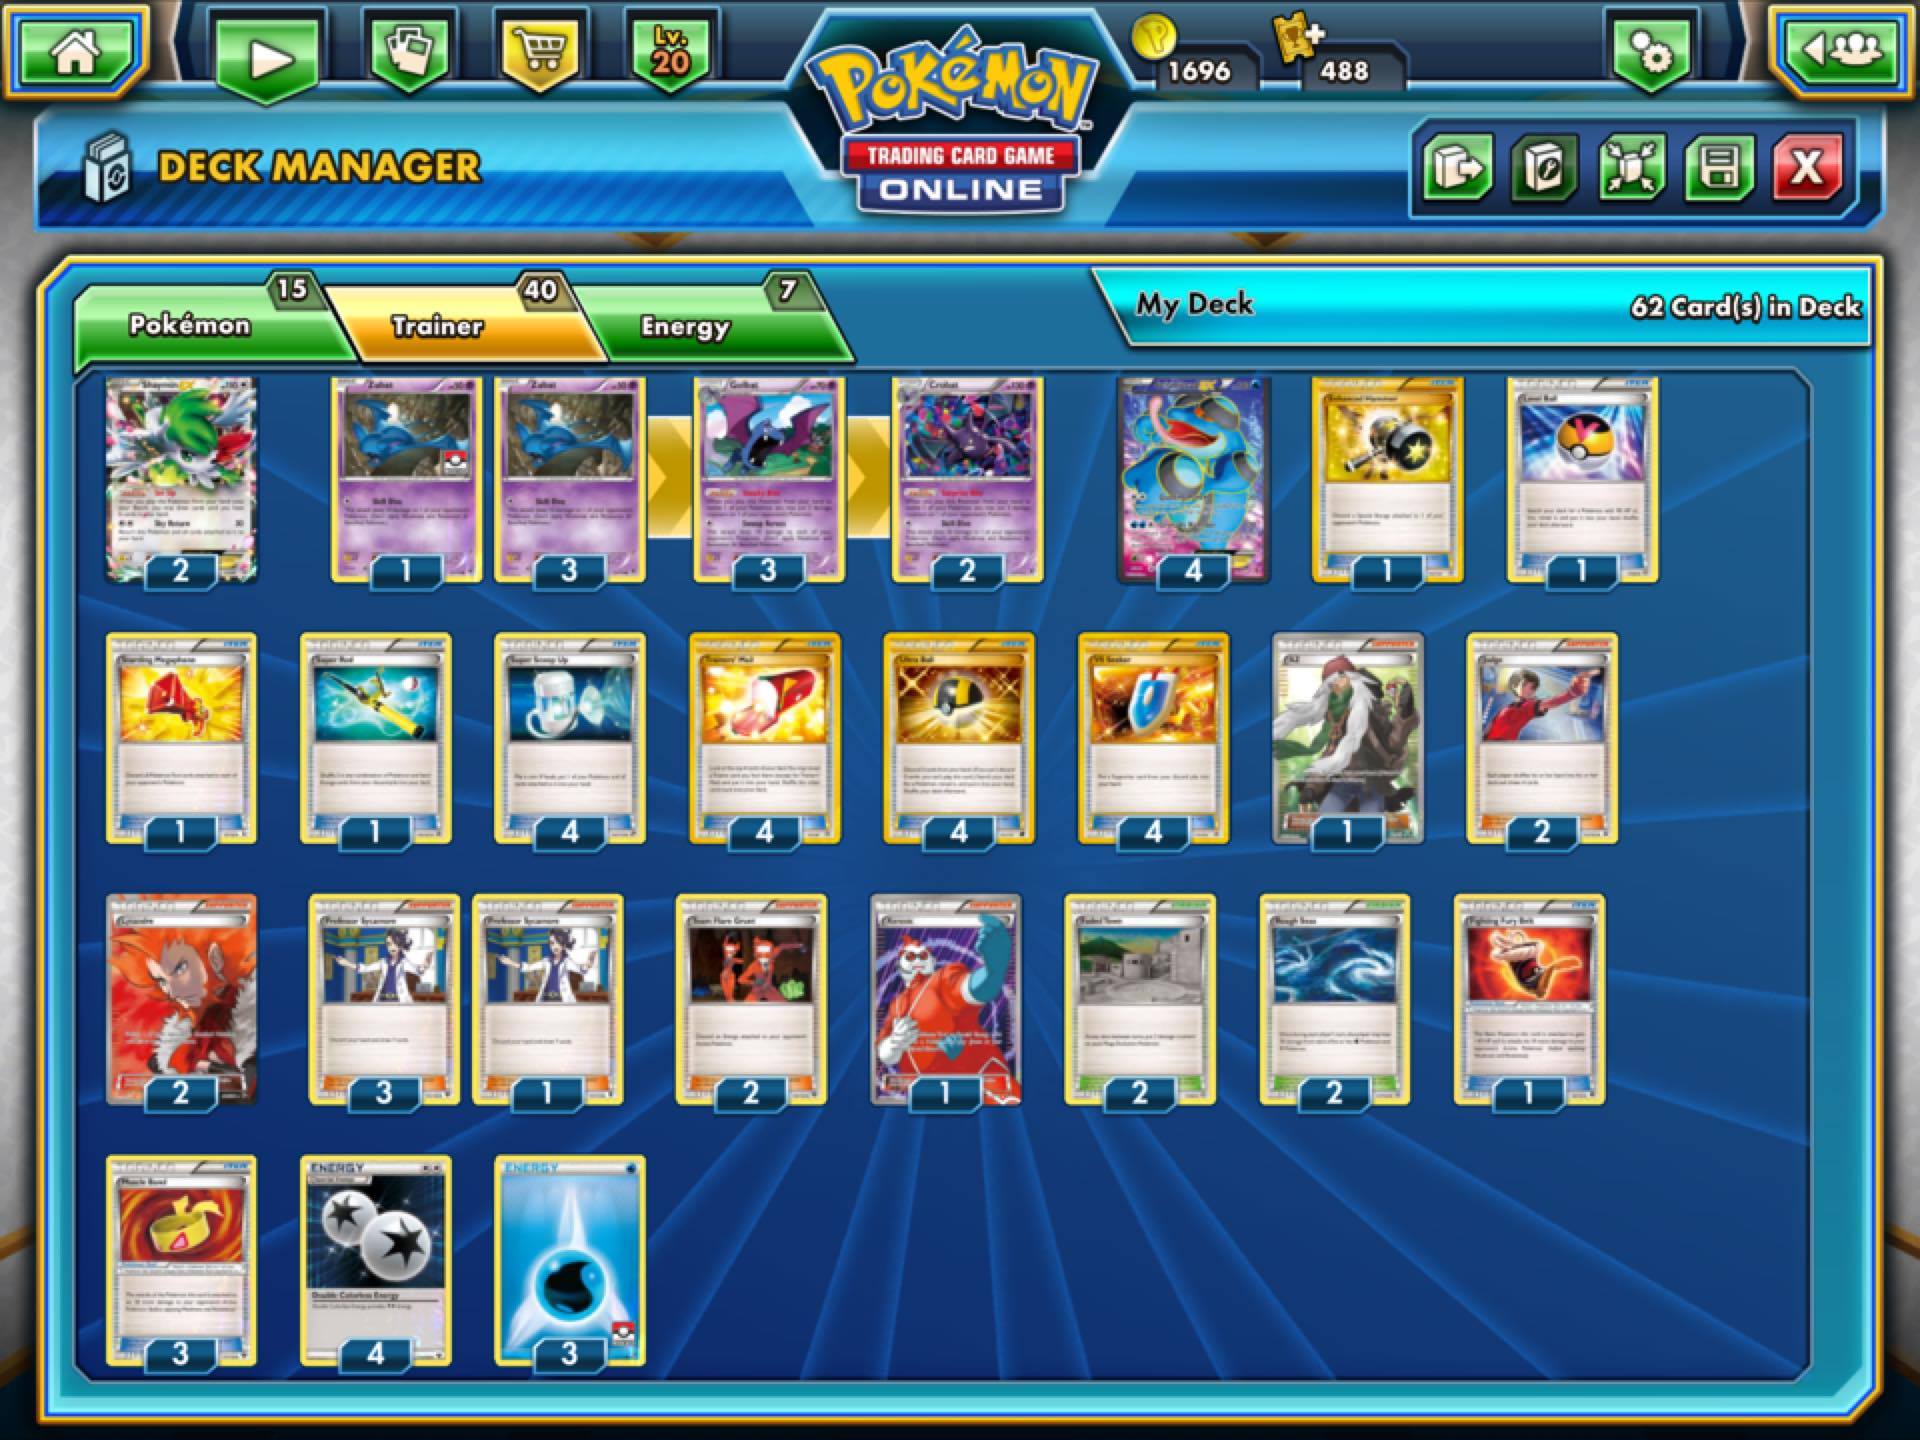
4 Seismitoad EX 4 Zubat 3 Golbat 2 Crobat 2 Shaymin EX 4 Professor Sycamore
2 Judge 2 Team Flare Grunt 2 Lysandre 1 AZ 1 Xerosic 4 Ultra Ball 4 Super Scoop Up 4 VS Seeker 3 Trainer’s Mail 2 Muscle Band 2 Rough Seas 2 Faded Town 1 Level Ball 1 Enhanced Hammer 1 Super Rod 1 Fighting Fury Belt 1 Startling Megaphone 4 Double Colourless Energy 3 Water Energy
I found this list to be very consistent and can deal with most popular decks in the standard format, I’d say it has a 50/50 or favourable matchup with most decks currently being played, but I’ll talk about matchups a little later. For now here are the reasons behind some of the counts and inclusions in the list.
4-3-2 Crobat Line
Some people may consider this a fairly thin bat line considering how important they are in this deck, 4-4-3 lines are pretty common and they do allow you to play a very aggressive game, however I don’t think that’s what this deck is about. I would be very surprised if someone told me they associate Toad with aggression because it just simply isn’t. This is a deck where you need to sit on a good hand, place your bat drops carefully and use them to soften or eliminate threats. This pyramid style line is perfect for that, they put on enough pressure early game that you are able to clean up those low HP basics, and the Level Ball really helps solidify these counts. It also allows you to apply a massive amount of damage in the late game when you hit a scoop up or play an AZ as you will likely have more Zubat and Golbat ready to be evolved. This line also means your hand is less likely to be clogged up with bats in the early game.
2 Team Flare Grunt, 2 Lysandre, 2 Judge, 0 Battle Compressor
So often these days we see high counts of Battle Compressor and VS Seeker and just one copy of most supporters, and don’t get me wrong that is a very strong and effective way to build a list, and that fact alone contributes to why Toad can dominate in this format. In such a heavy item lock format the extra counts of supporters really do help a lot. Running no Battle Compressor seems weird but it actually suits the play style of Toad really well. A compressor deck will tend to burn resources very fast and use their VS Seekers quickly to finish up a game in the first few turns. While Toad plays to the long game, every time you get the use of a second supporter without needing a VS Seeker strengthens the options you have for the late game. Being able to chain VS in the late game is super strong, multiple Flare Grunts, judges, AZ’s, these are the plays that make this deck so strong.
2 Rough Seas, 2 Faded Town
These are the cards that swing matchups into your favour. Rough Seas is the main stadium and it comes up a lot. One of the most satisfying things in this game is having a 220 HP Toad, healing 30 a turn to finally be close to getting knocked out when you hit the scoop up. Rough seas compliments the Bulky side of Toad Bats but the match-ups it works especially well against is Trevenant and Yveltal. The downside is that in some match-ups Rough seas is not a good card to have in play, and that’s the main reason for the split with Faded Town. Trust me when I say you do not want Rough Seas in play against Greninja or Manectric. The Faded Town not only acts as a counter stadium but checks some of Toads bad matchups. Mega Pokémon such as Manectric, Mewtwo, and Rayquaza would all be much more difficult without faded town. It turns some of these unfavourable matchups into even or favourable which, to me makes it well worth the inclusion. Even just having the stadium count at four helps in many situations. It allows you to win most stadium wars without difficulty, even decks that play four struggle to constantly replace the stadium under item lock.
Matchups:
Night March – Very Favourable
I’m sure it’s no surprise that this matchup is probably my favourite thing about this deck. The unstoppable bugs quickly fall to pieces when facing this deck, in my opinion Toad Bats beats Night March easier than any other deck. What do they do? Bench and attack with Joltic and they will surely lose the prize trade to bats, try using Pumpkaboo as you attempt to find a Dimension Valley and DCE every turn under item lock. Even if they can, they will struggle to deal with a Fury Belted Toad. Nothing about this matchup is fun for Night March, which is why Toad Bats realistically should never lose a game in this matchup unless it dead draws.
Trevenant – Favourable
Just like with most decks, going second and getting item locked turn one sucks. But it’s not as bad for this specific list as it plays 12 supporters. Assuming you are able to find a Toad and a DCE the trade isn’t too bad. The double Flare Grunt in combination with four stadiums can really give Trevenant trouble, not to mention the double Lysandre to drop the item lock. Overall this matchup is won by stadiums. Making them miss attacks or completely healing their attack insures you always stay one step ahead. Once you have cleared a Trevenant or two, in the late game it is very easy to win by simply using Grenade Hammer whenever your opponent has only one Trev in play. The pressure of having to find a new Trev every turn to come up and hit for just 30-60, that’s a trade they are never going to win.
Greninja – Even
This is a very interesting matchup, and is often very one-sided. You either get the lock up before they Water Duplicates and use bats to sweep all the low HP Pokémon, or they get off the Water Duplicates too early and they get too many Greninja into play. But when both players have a decent start that is when this trade becomes very interesting. Toad will usually be able to take the first few prizes and that is crucial for winning the game. Ideally, you need to be able to KO two Frogadier before they become Greninja. This means they are limited to only two Greninja in play without access to Sacred Ash or Super Rod. When the Shadow Stitching vs Quaking Punch war begins, who wins the trade is usually depending on whether Rough Seas is in play or not. Once the first Greninja goes down, you can start using Grenade Hammer to clear the final attackers in play, at this point, it will take the Greninja player too long to recover their field, even with access to items. Jirachi can also cause problems in the early game if you don’t have enough bats down to counter it. Overall a very close matchup if the game gets going but many games won’t even see past turn 3-4.
YZG – Even
This matchup is very difficult if the Yveltal player gets off a turn one Maxie. Premonition is a very strong ability as it allows your opponent to draw well under item lock. If they don’t get off the Maxie straight away, the item lock plus constant Flare Grunt pressure makes it very difficult for the Yveltal player to charge up big attacks. Rough Seas and Scoop ups can be used to help toads last a long time and bats can be used to soften the threats of Yveltal EX and Zoroark. Long story short, if you are able to use Scoop ups, Flare Grunts and Bats effectively then Toad Bats surely has the favour but if your opponent is able to apply early pressure and take quick knockouts or gets access to the Gallade then YZG is favoured. This is why the YZG matchup is probably the most enjoyable one to play, it really does depend on the list of each player and how well they draw/play.
Vespiquen/Vileplume – Very Unfavourable
A deck that item locks both players turn one and hits Toad for weakness. Naturally it is a very bad matchup. The high count of disruption supporters definitely does help. It opens up some good options where you can run your opponent out of energy. If you can Xerosic and Flare Grunt twice you just need to knockout one attacking Vespiquen. There is also the option of using Xerosic and Lysandre to discard the Float Stone on Vileplume and drag it up, but this doesn’t work if your opponent has access to AZ. Overall this matchup is pretty much unwinnable unless your opponent is forced to discard some important resources such DCE, AZ or Bunnelby. It is also worth noting that Shaymin EX is usually the better attacker than Seismitoad as your opponent will be item locked anyway and Shaymin allows you to promote a non EX.
That covers some of the most relevant matchups at the moment. Overall I felt pretty confident going into the Queensland Regional Championships, I knew that as long as I could avoid Vespiquen I would be able to have a decent run. Here are the matchups I played during swiss at the Queensland Regional Championships!
Queensland Regional Championships
Round 1: Keven L with Latios/Giratina (WW)
Round 2: Jeremy L with Greninja (WW)
Round 3: John H with Greninja (WLW)
Round 4: Aaron S with YZG (WW)
Round 5: Matthew B with YZG (ID)
Round 6: Ty F with Vespiquen/Vileplume (ID)
I finished swiss on a very comfortable record of 4-0-2, entering top cut at 4th seed!
Top 8 VS James Goreing with Toad Bats
Nothing like a 60 card mirror to start off top cut. James is a very good friend of mine and he helped me tweak the list in the lead up to the event. It sucked to be paired against him straight away but there is nothing you can do about it. In Game one, we were able to trade Flare Grunts for DCE’s pretty evenly but eventually he was able to break the lock and got too far ahead for me to catch up. Game 2 was much closer, we both disrupted each other very well and rough seas was in play for a large portion of the game meaning neither of us could capitalise on taking prizes. I was down to 2 while he still had most of his remaining. Knowing each other’s list allowed James to count my outs to retreating. He Lysandre’s up my Shaymin and I had no way left in deck to get it out of active. I could tell this would likely come to deck out. With a well-timed judge I was able to put myself ahead by one card. This forced him to try and take the knockout on my Shaymin to add extra cards to his hand. This means after the next Judge, he would be one card ahead. Luckily getting the Shaymin out of the active was all I needed as I was able to use bats and Quaking Punch to KO his Toad for my last two prizes a few turns later. I was pretty lucky to scrape my way through that game, unfortunately I don’t remember much of game 3 but I was able to take the win and proceed to top 4!
Top 4 VS Paul Coletta with Night March
Finally, my first Night March of the day. Paul seemed to have a super consistent list. He was able to discard a bunch of Night March Pokémon turn 1 as well as play Hex. Unfortunately for him prizing two Lampent was going to make this game difficult. Due to the first turn Hex I wasn’t able to get the turn one Quaking Punch. So he was able to take the first few prizes. Once I got going the game quickly turned. Using bats, I was quickly able to catch up in prizes while eliminating Night Marchers at the same time. He was still on 3 prizes and had to Sky Return loop to stall for some time. I noticed he only had one DCE remaining, I knew he couldn’t take all 3 prizes with it if I was careful, so eventually when he was able to safely promote a Pumpkaboo he Lysandre’d to get around my active Fury Belted Toad and got down to his final prize but I simply used Flare Grunt and Quaking Punch to seal the game. Game 2 was very different as he didn’t get an explosive turn one like in the first game. This forced him to Sky Return loop very early in the game but due to Rough Seas that was never going to be enough. Eventually I was able to use bats to KO the Night Marchers he had benched and I was able to use Grenade Hammer to KO his lone Shaymin.
Finals VS Ty Farry with Vespiquen/Vileplume
I’m not sure what to say about this match other than I got creamed. Probably the most 1-sided finals I had ever played in. He was able to get fully set up both game 1 and 2. I did my best to try and use my disruption supporters to control the game a little but I struggled to find them under item lock, even taking down a single Vespiquen was a huge task, one I only accomplished once all series. It wasn’t the most exciting finals I’ve ever seen but either way I’d like to say congratulations to Ty for winning this event.
Queensland Regionals was over and I was very pleased with my 2nd place finish! But with my local Regionals, the South Australian Regional Championships coming up in less than a week it was time to get straight back to testing. For most of the week I was planning on switching from Toad Bats to Mega Sceptile, as I was expecting a lot of Greninja as well as some people to follow in my footsteps of Toad Bats. My testing with Sceptile was going rather well but with Vespiquen Vileplume having won the last two Australian Regionals in a row I decided playing an item heavy mega deck in a field of item lock and Night March was not a good idea. I decided to stick with Toad Bats as it was the deck I felt most comfortable with but this time I was going to learn from my mistake in Brisbane and add an Aegislash EX. Rather than just hoping not to pair it, I decided that the 1 card tech was worth the inclusion even if it was useless in most other matchups. I ended up dropping one of the two Lysandre for it as I felt the second Lysandre was the card I could drop with the least impact on the rest of the deck. With an Aegislash in my list I was ready to take on the South Australian Regional Championships! Here were my matchups in swiss.
South Australia Regional Championships
Round 1: Scott J with Zoroark/Octiliry (WW)
Round 2: Kyal H with Greninja (LWW)
Round 3: Blake W with Night March (WW)
Round 4: Adam B with Greninja (WW)
Round 5: Steven F with Mega Mewtwo Y (ID)
Round 6: Chris M with Greninja (WLW scoop)
Going into the final swiss round my record was 4-0-1 so I knew I was pretty much guaranteed to make cut. Knowing this I decided to scoop to my round 6 opponent in an attempt to get a free win in top 8 (I knew one of the top seeded players from the event had to scoop their top 8 game to catch a flight). Unfortunately 7th seed was what I was aiming for but I ended up dropping down to 8th seed. On the bright side I got to play against the player I had just technically beaten in swiss in top 8 so I went into the matchup confident. Final swiss record was 4-1-1
Top 8 VS Chris Matejic with Greninja
In game 1, I had a bit of a slow start and wasn’t able to prevent him from setting up. He was quickly able to set up multiple Greninja. By the time I set up he had already taken too many prizes and gotten too far ahead so I lost the first game. Game 2 was very much the opposite as I get set up very quickly and take the game using Quaking Punch and Bats before he is able to set up. Going into game 3 I was very nervous as going first in the Greninja matchup is very important. I wasn’t able to get a turn 1 Quaking Punch and he was able to pull off a turn 2 Water Duplicates, I could tell this was going to be a hard match. Due to bats I was able to get a few early prizes, but once the Greninja got set up I had to deal with constant Shadow Stitching. With a few Judges and Flare Grunts I’m able to slow him down long enough to KO a Greninja. I managed to land a critical Scoop Up flip to save a Toad. Eventually when he whiffed the energy after Flare Grunt I was able to take out the Greninja with lots of Bats and two Quaking Punches, after this he was out of resources and I am able to win this close game.
Top 4 VS Blake Wightman with Night March
I drew absolutely dead in game 1 against Blake, by the time I draw out of it Blake was already fully set up and multiple prizes ahead. I try to catch-up but his lead is too great so I lose the first game. Game 2 he draws just as badly as I did in game 1, I get a turn two Quaking Punch off and the game is basically over. In the third game the match goes pretty much as expected. He goes first and gets about 6 Night Marchers in the discard, I get an early Quaking Punch and use bats to take extra prizes. He manages to take out one toad in the mid game but after that I steamroll the rest of the match with bats and constant item lock.
Finals VS Matty Masefield with Mega Dragon Rayquaza
Wow, Mega Dragon Rayquaza made it to the finals, gotta be honest I didn’t see this one coming. No one but my good mate Matty could have pulled this off. I was happy I’d finally get a chance to use my Faded Town effectively but I still wasn’t excited to face a 230 HP beast with water resistance due to the ancient trait. This deck has one of the only energy accelerators that works under item lock in the form of Reshiram, making it quite hard to deal with. In game 1 he sets up quite quickly while I start to soften the Dragon Ray on the bench using bats and an Enhanced Hammer to slow it down. I take out two Reshiram as he is forced to manually mega evolve his Dragon Rayquaza. Next turn he brings up the Mega Ray and explodes my Toad for 300. I am able to use Flare Grunt on his only basic Lightning Energy meaning he is forced to use another Double Dragon Energy to take the KO on my Toad. At this point he has only one or two prizes left to my 4, two half powered Dragon Rays and one Double Dragon left in deck. I use Judge to bring his hand down and continue to pick at his Mega with bats as I’m still unable to find a Faded Town. He still has 50 HP left on this Dragon Ray and the other one has full HP. I was lucky that he whiffed the Double Dragon energy that turn but I Know I have to wrap this game up quickly. I have two options at this point, I can use AZ to pick up Crobat and use the 50 damage to KO his Benched Dragon Ray but then he just needs the double dragon on the other Ray to win the game. So instead I decide to Lysandre up his Hydreigon EX as it’s the only Pokémon in play with a retreat cost. I then attach a water to my Active Seismitoad with Fury Belt and Quaking Punch for 40. Next turn he is unable to find his second Hydreigon EX and Double Dragon to retreat and attack for game so instead he attaches a basic to active and passes, I have just one turn left to win the game. I AZ my Crobat this turn and use it to finish off the Mega Ray on the bench and attach the second water to my active Toad to Grenade Hammer for a four prize turn for game. It was super close. Unfortunately game 2 is not as close, Matty isn’t able to get an explosive start this game and has to manually mega to end his turn. I continue the Quaking Punch lock and get Faded Town to start applying pressure to the benched Mega Ray. For multiple turns Matty is forced to pass with his hand full of items and I slowly chip away at his Ray with both Bats and Faded Town. Just before his Ray is knocked out Matty concedes the game revealing his hand of 7 or 8 items. That was the moment I became the Adelaide Regional Champion.
After back to back first and second place finishes at Regional Championships, I felt like there was no reason to change decks going into the Victorian Regional Championships. Ironically the one time I added the Aegislash EX was the one time I didn’t play against any Vespiquen/Vileplume decks all day. I considered dropping the Aegislash for Victoria as well as a few other edits but in the end I felt comfortable running the same 60 cards I used at the South Australian Regional Championship. The Regional Championships in Victoria the week after was a huge event. With a total of 93 masters, this event was officially the biggest Pokémon TCG Tournament in Australian history with the exception of Nationals. This meant there was a total of seven swiss rounds unlike the previous Regionals which only had six. Here were my swiss matchups at the Victorian Regional Championships.
Victoria Regional Championships
Round 1: Cameron D with Night March (WW)
Round 2: Silv L with Jolteon/Flareon/Max Elixer (LWW)
Round 3: James W with Vespiquen/Vileplume (WW)
Round 4: Angus J with Night March (WW)
Round 5: Blake D with Vespiquen/Vileplume (WLW)
Round 6: Matty M with Night March (ID)
Round 7: Jeremy L with YZG (ID)
I felt very happy finishing Swiss on a 5-0-2 record, being the biggest Australian Regional Championships ever, I was just stoked to have made top 8. Finally the Aegislash EX payed off! I played two Vespiquen decks in swiss, interestingly enough I only used Aegislash once in each of those swiss games. I managed to pull off one of my wins in each game without even getting it out. With a few Night March in cut I knew I had a good shot at winning if I could get past the first game.
Top 8 VS Dylan Tedja with Toad/Tina
I win the coin flip and choose to go first, but when I draw my hand, I open with a lone Zubat and the only playable cards being a Super Scoop Up and a DCE, neither being cards I was willing to play, so I simply passed. He managed to find the Toad, DCE, and Muscle Band then used Cassius on the active for Game, not exactly the way I wanted my first top 8 match to go. Second game I manage to draw a decent hand and get the item lock up very early. Every time he attached I was able to Flare Grunt or Xerosic and then VS for it back the next turn. I had taken most of my prizes and he was still yet to make an impact on the game, so he scooped. Going into game 3 I was once again able to take control of the game early but this time he was able to fight back with some Flare Grunt of his own. I was forced to discard most of my VS Seekers in the mid game so I was very worried I wouldn’t have enough ways to discard energy when I needed to. As we got further in to the game, the prize count was 4-6 in my favour and we were both struggling to find energy. He dug super far into his deck to find an energy and then he ended up conceding, I was confused by this but then he flipped over his prizes to reveal two Double Colourless energy and two Double Dragon energy. Super unlucky for my opponent but it’s a part of the game. I was lucky enough to move on to top 4 once again.
Top 4 VS Matty Masefield with Night March
Top 4 I get to play Matty again, this time he is playing Night March instead of Dragon Ray, even though this was because he left his deck at home, Night March seems to have been a good deck choice anyway. In game 1 Matty has an absolutely terrible starting hand and passes without getting a single Battle Compressor or even a single Night Marcher in the discard. I item lock him straight away and he is not able to do anything so scoops a few turns later. Game 2 is a little more exciting as he is able to have a fairly decent turn one. He benched a total of four Night Marchers to try and get me to KO them so he can hit me back for one shots. However, over the next two turns I am able to KO all four Night Marchers with a combination of lots of bats and two Quaking Punches, I go down to two prizes to his six and I left his with just two Shaymin in play. Matty knows this game is going nowhere as I’m too far ahead and scoops.
Finals VS Blake Davies with Vespiquen/Vileplume
Vespiquen/Vileplume in the finals, this sounds familiar. Luckily thanks to Aegislash EX I am prepared this time. I was lucky enough to win the coin flip, I drew my hand for game 1 and open lone Toad with a dead hand. I have a DCE and a Flare Grunt so I can apply pressure if given the chance but with the speed of Vespiquen/Vileplume I wasn’t too hopeful. Blake mulligans once which gives me one more card to draw out of this hand. Next hand he gets a basic, and opens lone Bunnelby. I take the mull draw, VS Seeker, just one more card left to save myself, I pickup, Ultra Ball! Instead of using Ultra Ball to get Shaymin I knew my hand was workable with the DCE and Flare Grunt. So I decided to play it safe and Ultra Ball straight for Aegislash, bench it and pass. On Blake’s turn he gets the standard setup of Vespiquen and Vileplume turn one, and decides to double Burrow. I Flare Grunt, attach DCE and Quaking Punch, this puts Blake in an awkward position, he has two DCE in the discard already and so he can’t burn an energy to retreat, he is forced to use another energy to double Rototiller the DCEs. Obviously the Bunnelby falls to another Quaking Punch and with the Aegislash in play he now has no response without the Bunnelby, Blake scoops one turn later. Game 2 I once again open Toad but this time Blake is starting. He opens Unown, plays one or two cards and then passes. I couldn’t believe it. Without any set up, I know a Quaking Punch at this point would win me the game, my hand already has a DCE, so I Quaking punch for three turns, to KO the Unown and Oddish he had benched for game. Super unlucky for my opponent to get a hand that bad in the finals. Nothing he could have done about it.
I actually did it, I had won the biggest Regional Championships in Australian History. Toad Bats with Aegislash definitely ended up being the right play. I think it’s safe to say I may not have even made top cut if I had decided not to play Aegislash. If the format for Nationals and Worlds was the same format as these Regional Championships I would have happily sat on this list for the rest of the season, however from this point on, Fates Collide will be legal for competitive play. This brings up the question, is Toad still viable in the XY-Fates Collide format?
Fates Collide
Toad gets some new cards to play around with from Fates Collide. Firstly, you get the option of playing Mega Alakazam instead of bats. Every Alakazam drop is equivalent to a Golbat and a Crobat, which is huge. This also gives you the option of running Dimension Valley and Psychic energy to use Alakazam as a late game sweeper instead of Grenade Hammer. Overall this has the potential to give Toad a huge boost in aggression but with the reliance of Sprit Links it makes this variant a lot worse against most item lock decks. Another option is adding Mew with Dimension Valley, Mew allows you to Quaking Punch with just a basic energy, or Grenade Hammer with just two basic water. The Dimension Valley also allows you to attack with bats for free when you’re in a tough spot.
Toad also has some enemies from the Fates Collide expansion. The reason why I prefer Toad over most other item lock decks is because there is no way to break the lock. Vileplume can be stopped with Hex, and Trevenant with Hex or Lysandre. But nothing can break the Quaking Punch lock, until now. Marowak’s ability Bodygaurd eliminates the effects of Pokémon attacks that target a players hand, this includes Quaking Punch. Any deck that successfully gets a Marowak into play is going to cause huge problems for Toad decks, realistically the only way to deal with it is using a Hex Maniac or simply knocking it out. On the bright side for Toad, Marowak is a stage one so players might have trouble finding the Marowak in the first place. Another problem Toad might encounter is Carbink. There are two Carbink in the Fates Collide set, the first one I will be talking about is the one with the Safeguard ability. This is an ability we have all seen before and it’s finally back in the standard format. Toad may find it difficult to knock this little guy out however there are many ways to get around it including Bats, Mew, Druddigon, Silent Lab and Alakazam. While it’s not game changing there is no denying that Carbink is going to be an annoying Pokémon to deal with, especially for the Giratina variants of Toad. The other Carbink has an ability called Energy Keeper which prevents the Basic energy attached to Basic Pokémon from being discarded. This is bad news for most Toad decks as energy disruption are often a core part of their strategy. Toad Bats specifically isn’t effected too badly by this card but it does make Flare Grunt less powerful so the second inclusion may not be as worthwhile as it has been in the past.
The final card I would like to talk about is one we have all been wanting back for a long time. That’s right, the prince has returned! N is once again going to be making a huge impact on the game, as it completely changes the way players must play through the game. Players will need to learn how to thin their decks effectively so that they don’t get caught by a late game N to just one or two cards. Not only that, in some circumstances it is very important to save your recourses for when an N is played. Having 2-3 Trainer’s Mail left in your deck for the late game could be just what you need to survive a late game N. But what does this have to do with Toad? Well, to put it simply, Toad takes away your opponents ability to prepare for an N. If you look in your opponents discard and see four Sycamore, an N to one with Quaking Punch could be all you need to steal a game. It is very hard to draw out of a small hand without access to VS Seekers, Acro Bikes and Trainer’s Mails etc. Especially with the item heavy draw lines decks are typically playing this year. Obviously N is a card all decks will take advantage of, but I believe item lock decks such as Toad will be able to use N better than other decks, it’s just one more element of control for Toad to take advantage of.
So, is toad still viable post Fates Collide? To be honest, I don’t know, only time will tell. Toad has some new hurdles it will have to overcome but I believe Toad will always have its place in this format until the day it is rotated. Oddly enough Toad is an extremely versatile card and has seen many different partners over the last few years. I am very excited to see what creative uses people find for this card at the remaining Regional, National and World Championships this year.
Thanks for reading.
Jordan Palmer
Related Posts


One comment
Leave a reply
 The 5000IQ approach to the ...August 30, 2018An in-depth guide to Metagross in the new format Hello ...
 We Wanna Be The Very ...August 20, 2018We Wanna Be The Very Best Like No One Ever ...
 Dunsparce: Nostalgia Goggles or The ...August 10, 2018With Celestial Storm hitting store shelves, everyone’s busy running around ...

Jeff C June 22, 2016 at 11:26 pm
Great job with your deck!
The only thing i noticed on your deck list from TCGO is that it contains 62 cards… I wonder if this why you did so well..